Create Email Templates
This is where you create email templates which are usable and available throughout the application, for use in Newsletters or Automations.
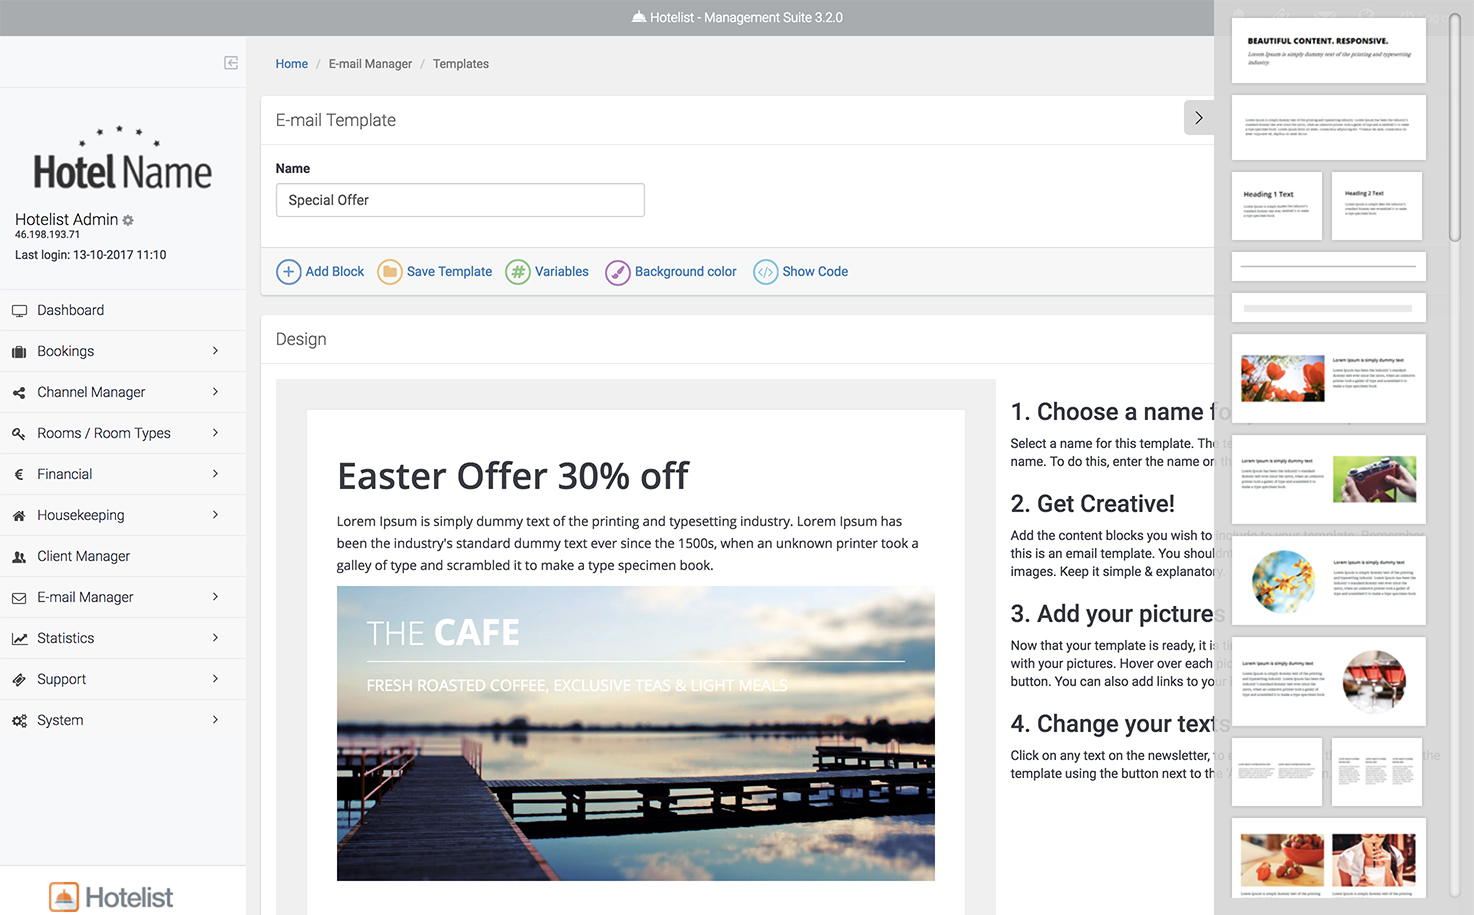
Navigate to "Email Manager -> Templates" from the main menu, and press the "+ New Template" button at the top toolbar. Give your template a name and click on "+ Add Block" to start dragging blocks inside the email template available space.
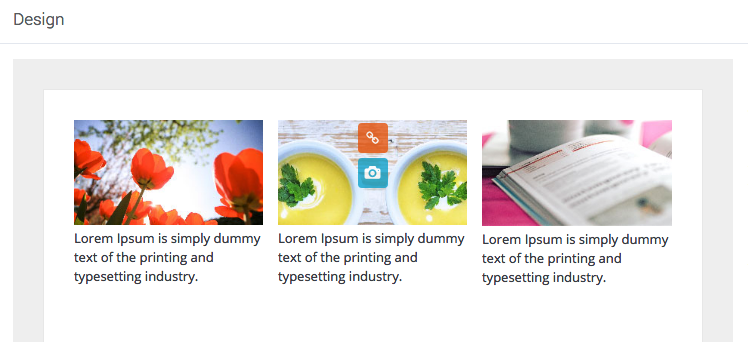
To replace the pseudo-texts with your own, click on the text and start editing the text immediately. To replace the photographs with your own, click on the camera icon that appears on the photograph when you roll your mouse over it.
You can add custom merge variables that will be replaced with real values before sending any email. To add variables to your template, like the guest's name or the reservation ID, for example, open up the variables box by clicking the "Variables" button and then select the copy icon of the variable you wish to use. Paste this variable wherever you want on your email text.
Click on "Save Template" button to save your email template.
Create Newsletters
To send newsletters, either immediately or at a scheduled date, navigate to "Email Manager -> Newsletter" from the main menu, and click the "+ Create Newsletter" button from the top toolbar.
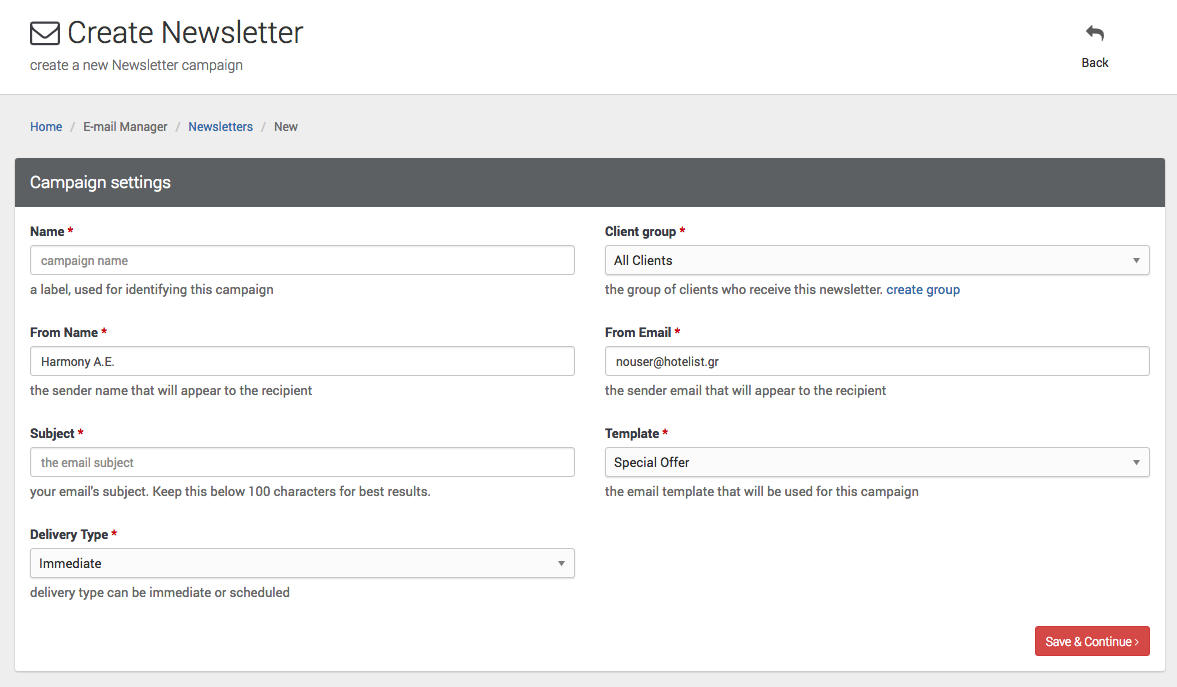
In the next step, fill in the Newsletter campaign Name, sender email, Clients group etc, and select the delivery type and date as well as the Email Template to use (you will be able to make adjustments to the template in the next step). Click "Save & Continue" to go to the next step.
Modify the selected template, changing what you need. As soon as your editing is complete, click "Save Design & Review".
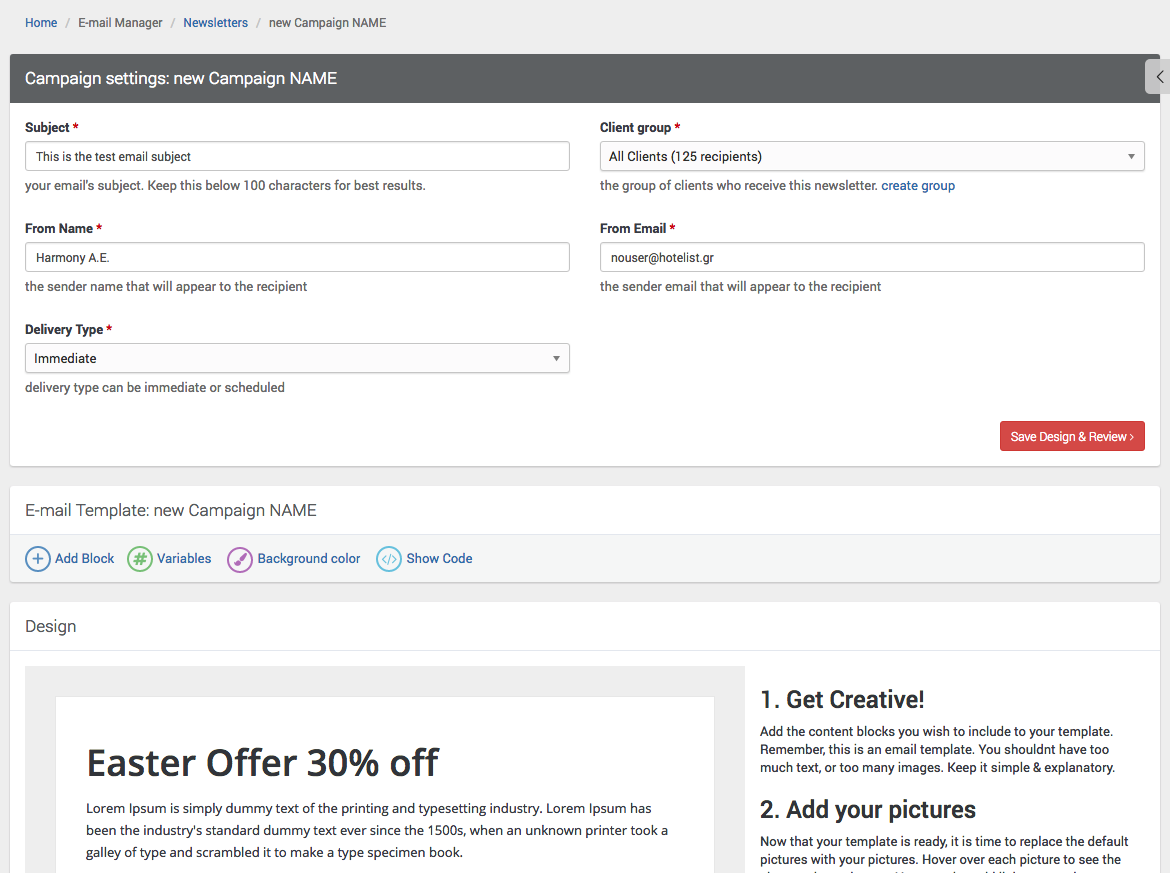
Your newsletter is ready to be scheduled! Clicking the "Send" or "Schedule" button will finish the process.

Create Automations
Create automations that will be executed based on various "triggers". For example, send a Welcome email 1 day before the check-in of a reservation. Navigate to "Email Manager -> Automations" from the main menu, and click on the "+ New Automation" button at the top toolbar, to create a new automation.
In the first step, fill in the automation name, its trigger (when to fire), the reservation source (fire automation only for specific sources, e.g. expedia), the guest nationality (to be able to send messages in different languages, or omit other Nationalities) and click "Create & Edit".
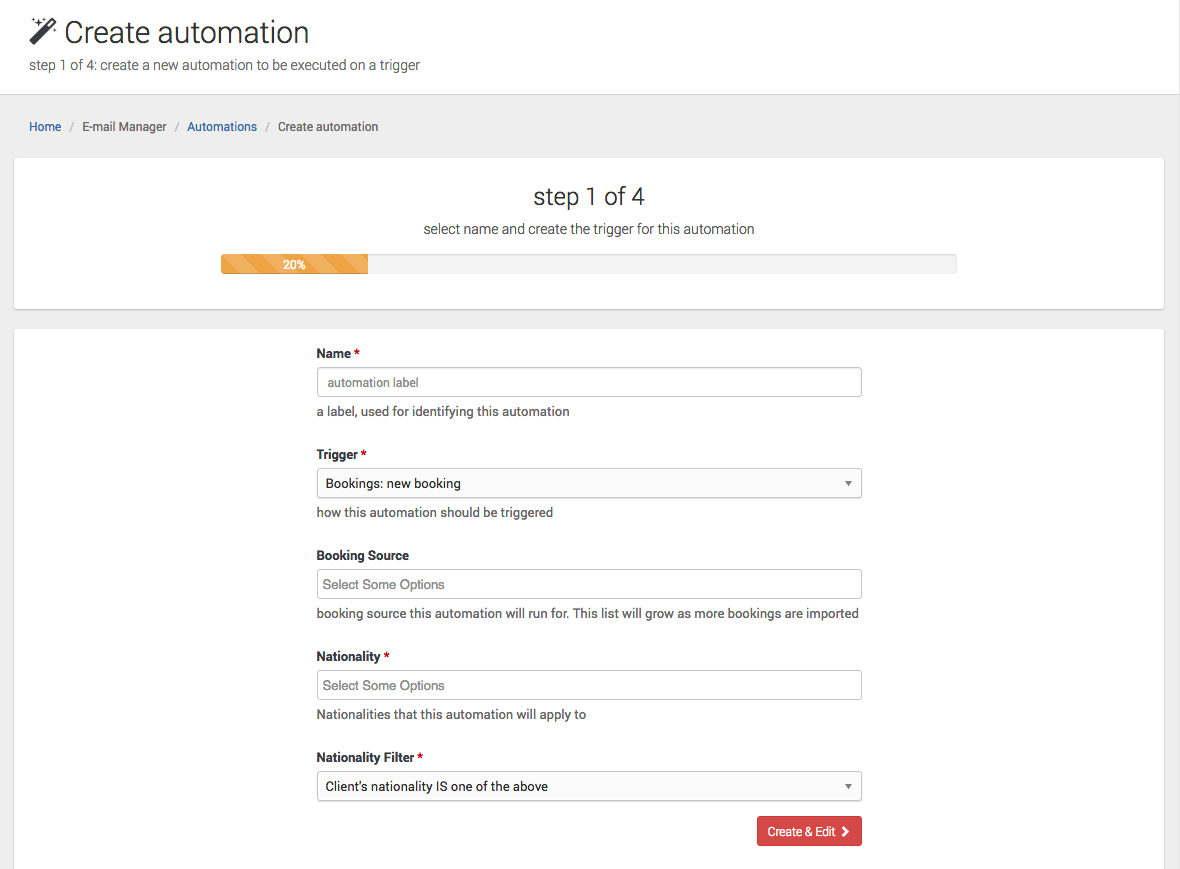
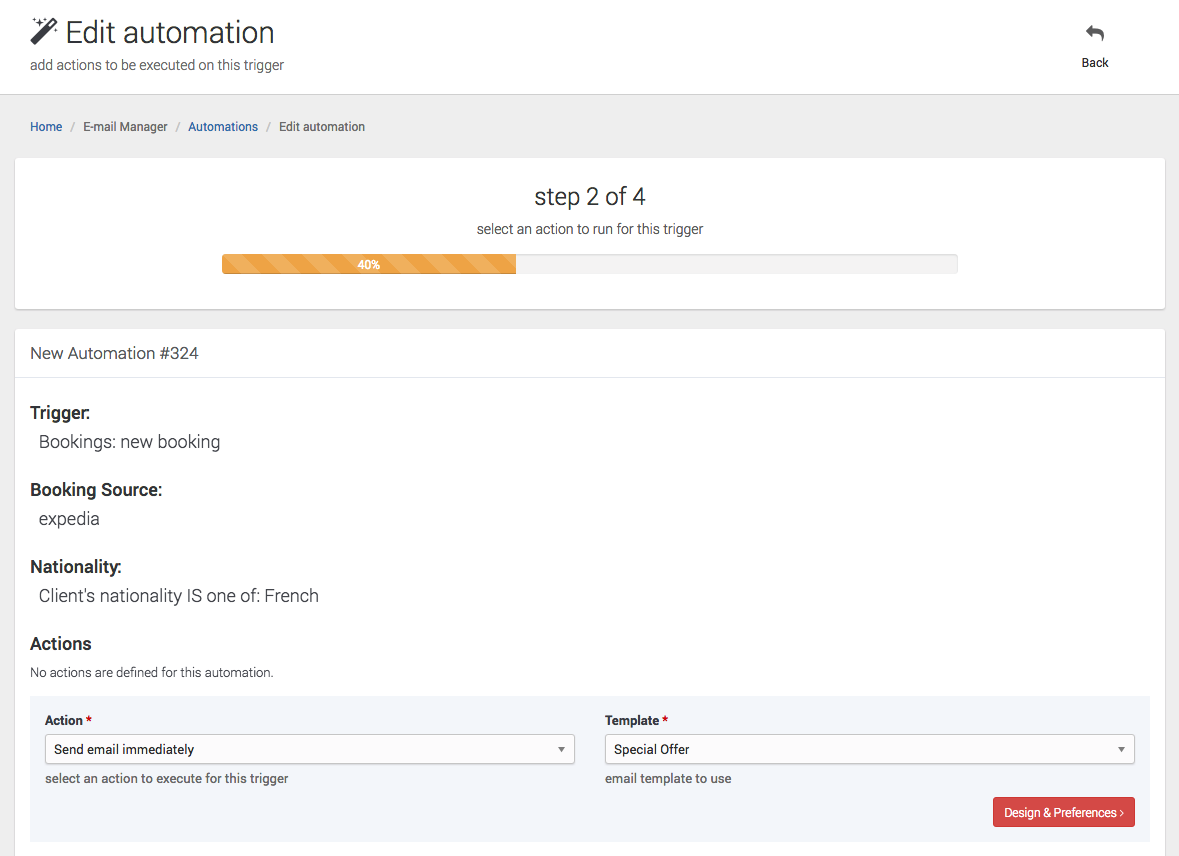
In the second step, you can create the actions that will automation will execute. You may have more than 1 emails or actions executed, per trigger.
There are 3 action types that an automation can execute:
- Immediate email delivery.
- Delivery on a later date (with filters like X days before checkin or X days after checkout etc).
- Repeated delivery on a specific date.
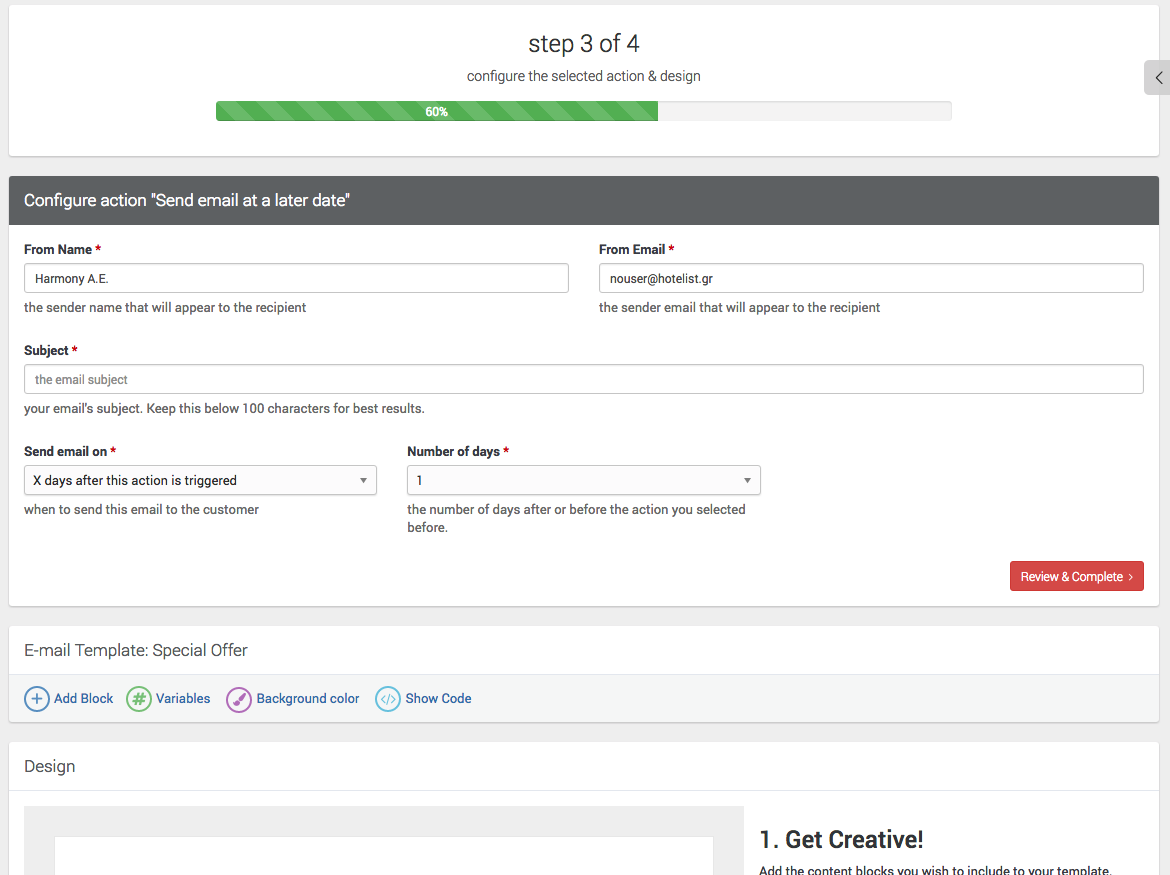
Action types 2 and 3 can be configured in the next step (3).
In step 3, add the Sender Name and Email, as well as the Subject. In this step you can also configure the non-immediate sending parameters.
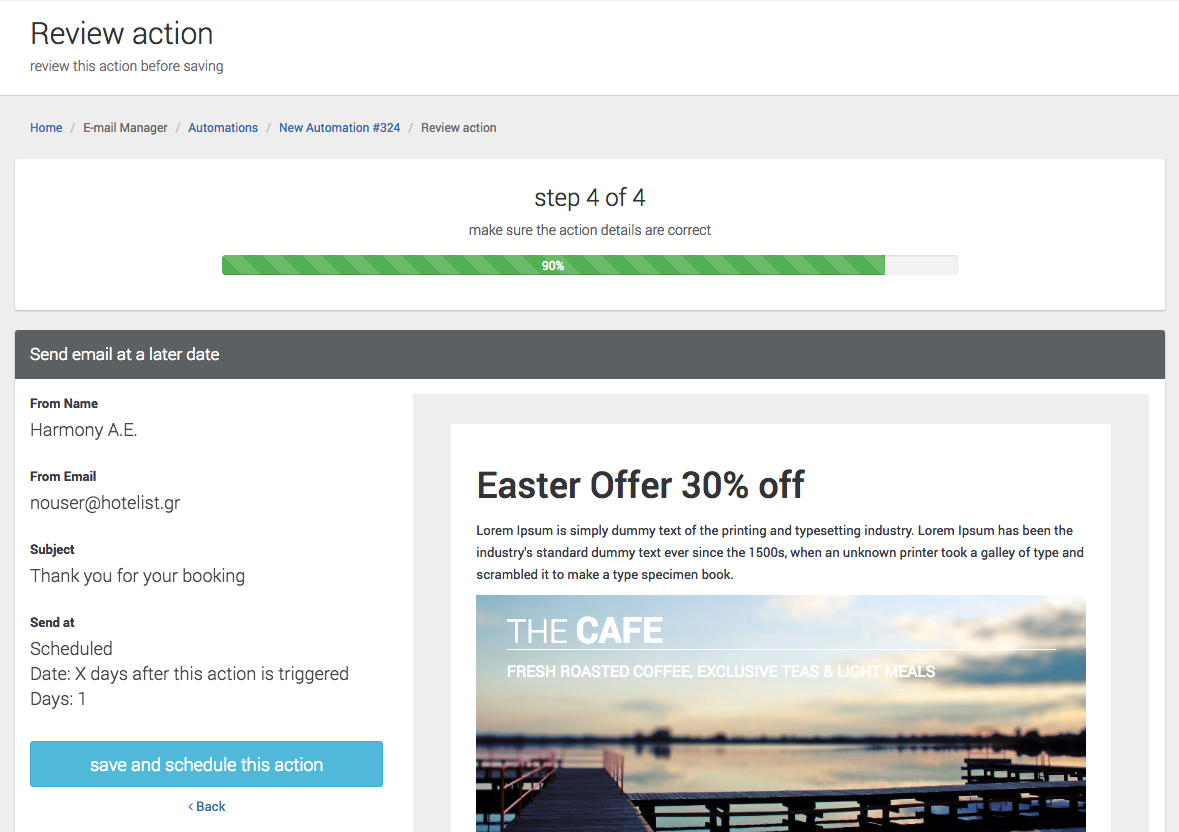
Also, you can edit and modify the selected template. Once your are done editing and configuring this action, click "Review & Complete".
This automation action has been configured. Click "Save and Schedule this Action" to save it.
